


The Ultimate Guide to Using a Plastic Rice Cooker in Your Microwave: Convenience Meets Efficiency!
Look no further than using a plastic rice cooker in your microwave! This often-overlooked kitchen tool combines convenience and efficiency, making it a must-have for any busy household. In this guide, we will take you through everything you need to know about using a plastic rice cooker in your microwave, from choosing the right one to cleaning and maintenance tips. Say goodbye to soggy or burnt rice and hello to perfectly cooked grains every time with our ultimate guide.
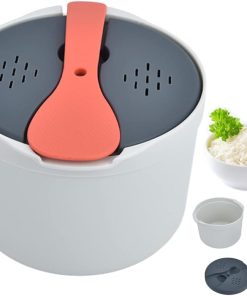
Say goodbye to the endless guessing game and welcome the convenience of a plastic rice cooker for the microwave! This handy kitchen tool is designed to simplify your cooking experience while consistently delivering perfectly fluffy grains. Whether you’re preparing a quick weeknight dinner or meal-prepping for the week ahead, this ultimate guide will help you unlock the full potential of your plastic rice cooker. Let’s dive into tips, maintenance, and alternatives that can elevate your cooking game!
Tips for Perfectly Cooked Rice Every Time
Start with the proper water ratio to rice to achieve perfectly cooked rice. A standard guideline is two cups of water for every cup of rice, but this can vary based on the type you choose.
Rinsing your rice before cooking is essential. This step removes excess starch and prevents a gummy texture. Rinse until the water runs clear, ensuring a fluffier result.
Pay attention to cooking time as well. Microwaves differ in power, so adjust accordingly. For white rice, start with 10-12 minutes on high and check for doneness.
After microwaving, cover your rice and let it sit for about five minutes. This resting period allows steam to finish cooking the grains evenly.
Fluff your rice gently with a fork before serving. This simple action separates any clumps and enhances its appearance!
Cleaning and Maintenance of Your Plastic Rice Cooker
Cleaning your plastic rice cooker is simple and quick. First, let it cool down after use. This prevents burns and makes handling easier.
Use warm, soapy water for the initial rinse. A soft sponge works best to avoid scratches on the surface. Ensure you clean both the inner pot and the lid thoroughly.
A mixture of baking soda and water can work wonders for tough stains or odors. Let it sit for a few minutes before gently scrubbing.
Rinse well to remove any soap residue, then dry completely with a cloth or let air dry upright.
Regular maintenance prolongs its life span. Check for any cracks or wear over time; this ensures safe usage whenever you cook rice in your microwave!
Alternatives to Using a Plastic Rice Cooker in the Microwave
While a plastic rice cooker for microwave use is convenient, there are alternatives worth exploring. Consider these options if you want to switch things up or need your trusty cooker.
A stovetop pot is a classic choice. It allows precise control over heat and can accommodate larger quantities of rice. Before adding the rice, bring water to a boil, then reduce the heat and cover. This method requires more attention but results in perfectly fluffy grains.
Another alternative is using a pressure cooker. These versatile appliances cook rice quickly and efficiently while preserving nutrients. For best results, make sure to follow the right water-to-rice ratio.
For those who enjoy kitchen gadgets, an electric steamer can also be useful. By steaming your rice instead of boiling it, you’ll achieve light and airy textures that complement any meal beautifully.
Consider trying out instant ramen bowls explicitly designed for microwaves. Though typically meant for noodles, many also have adjustable settings suitable for cooking rice.
Each option has unique benefits and challenges; experimenting with them can produce delicious outcomes in your kitchen adventures. Whether sticking with your plastic cooker or branching out into new methods, there’s no shortage of ways to enjoy perfectly cooked rice every time.