
The Essential Guide to Choosing the Perfect Sushi Rice Net: What You Need to Know
Sushi lovers know that the secret to an unforgettable sushi experience lies in one key element: the rice. While fresh fish and colorful vegetables steal the limelight, sushi rice holds everything together. If you’re diving into the world of sushi making at home, understanding how to choose the right sushi rice net is crucial for your culinary success.
Navigating through aisles filled with different varieties can be overwhelming. Do you go for short grain or medium? Should you opt for organic? Fear not! This guide will unravel everything about selecting and preparing perfect sushi rice, ensuring each roll you create is as delightful as a meal from your favorite restaurant. Let’s embark on this flavorful journey together!
Types of Sushi Rice
Not all sushi rice varieties are created equal. The most popular choice is short-grain rice, known for its sticky texture and ability to hold together. This quality makes it perfect for forming rolls or nigiri.
Another option is medium-grain rice, which offers a slightly firmer bite while still maintaining some stickiness. It can be an excellent alternative if you’re looking for something different.
For those who prioritize health, consider organic sushi rice. Grown without pesticides or chemicals, this choice can elevate your dish’s taste and nutrition.
Specialty rice like black or red sushi offers unique flavors and colors that can turn any plate into a showstopper. Experimenting with these types lets you find the perfect match for your culinary creations!
Cooking and Preparing Sushi Rice
Cooking sushi rice requires attention to detail, but it’s pretty straightforward. Start by rinsing the rice under cold water until the water runs clear. This removes excess starch and prevents your sushi from becoming too sticky.
Once rinsed, soak the rice for about 30 minutes. This helps achieve that perfect texture you want in sushi. After soaking, drain and transfer the rice to a pot with fresh water—typically, a 1:1 ratio works well.
Please bring it to a boil, then reduce heat to low, covering tightly. Let it simmer for around 18 minutes without lifting the lid. Patience is critical here; let it rest off heat for ten minutes.
While resting, prepare your vinegar mixture using rice, sugar, and salt. Once ready, fold this mixture gently into your cooked rice. It adds flavor while maintaining that crucial stickiness that is essential for rolling or molding sushi effectively.
Tips and Tricks for Perfect Sushi Rice Every Time
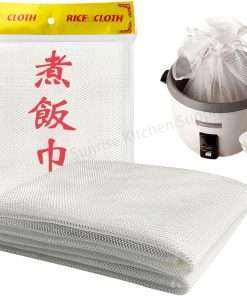
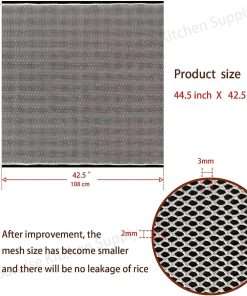
When it comes to perfecting sushi rice, a few key tips can elevate your game. Start with the right sushi rice net—a fine mesh variety works best for rinsing and draining. This ensures you remove excess starch without losing grains.
Before cooking, soak the rice for at least 30 minutes. This step helps achieve that ideal chewy texture in sushi rolls. The soaking allows each grain to absorb water evenly and promotes better cooking results.
The type of water you use also matters. Consider using filtered or spring water rather than tap water, as impurities can affect flavor and texture.
Pay attention to your cooking method, too. A rice cooker often yields consistent results due to its precise temperature control. If you’re using a stovetop method, keep an eye on your pot; adjusting heat levels is crucial after bringing the mixture to a boil.
After steaming your cooked sushi rice, let it rest covered for about ten minutes before seasoning it with a vinegar mixture made from rice vinegar, sugar, and salt. Gently fold this into the warm rice while fanning it lightly, enhancing flavor and ensuring even distribution.
If you don’t use all of your prepared sushi rice immediately, storage plays a significant role. Wrap any leftovers tightly in plastic wrap or seal them in an airtight container at room temperature for optimal freshness until ready to use.
With these tips, you’ll be well-equipped to create delicious sushi every time!


Rice Cooker Parts and Accessories
43″ x 43″ Sushi Rice Cooking Net/Rice Cooker Napkin/Sushi Rice Cooking Napkin (4)


